Nice and simple, turn on, wait, turn off, wait.
It's important to remember to delay after turning the LED off, otherwise the loop immediately goes back to the start and turns it 1(ON) again, so fast you'll never see it turn off.
We know a little about how to get our microcontroller to talk to us and do some counting.
Let's get it to do something in the real world.
Let's start with a new, empty program.
    void setup() {

    }

    void loop() {

    }
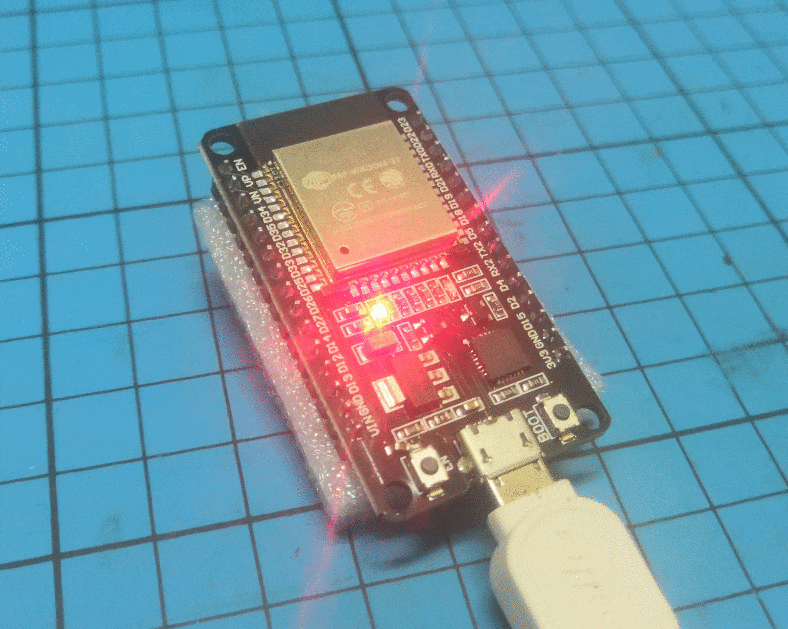
The ESP32 has an LED light connected to pin 2.
To send power through it we need to do two things.
pinMode(2, OUTPUT);
This puts the pin in OUTPUT mode, where it can act as a + or - connection at 3.3v or 0v.
This only needs to be done once, so we know where that code should go. eg setup(){} or loop(){}.
digitalWrite(2, 1);
digitalWrite(2, 0);
digitalWrite(pin, value) sets a pin to either 1(ON) 3.3v, or 0(OFF) 0v
Let's test it out with the following code.
    void setup() {
        pinMode(2, OUTPUT);
    }

    void loop() {
        digitalWrite(2, 1);             // led on
        delay(1000);                    // wait 1 sec
        digitalWrite(2, 0);             // led off
        delay(1000);                    // wait 1 sec
    }
Now press the UPLOAD button and see what happens.
Nice and simple, turn on, wait, turn off, wait.
It's important to remember to delay after turning the LED off, otherwise the loop immediately goes back to the start and turns it 1(ON) again, so fast you'll never see it turn off.
That worked with the built in LED, let's add our own.
UNPLUG THE USB FIRST.
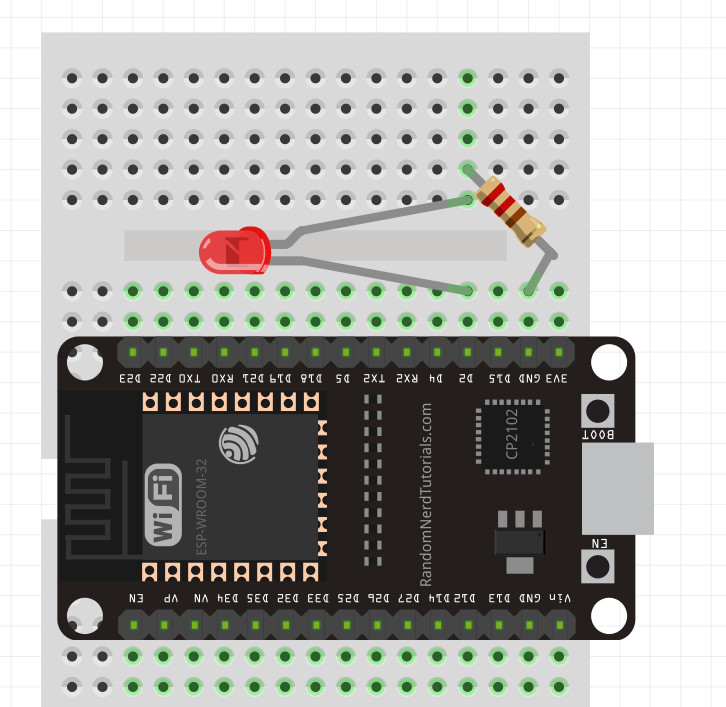
The long leg of the LED should connect next to pin D2.
The resistor should connect from the short leg of LED to GND on the microcontroller.
Plug the USB back in.
You should now see your LED light up at the same time as the built in blue LED.
If it doesn't, check your connections and try rotating the LED.
Move the external LED from pin D2 to pin D4.
Make the external LED do the opposite of what the built in one does, when one light is on, the other should be off and vice versa.
HINT: You'll need to set the pinMode and digitalWrite of D4 as well as D2.