Today we are going to begin building this lovely box!
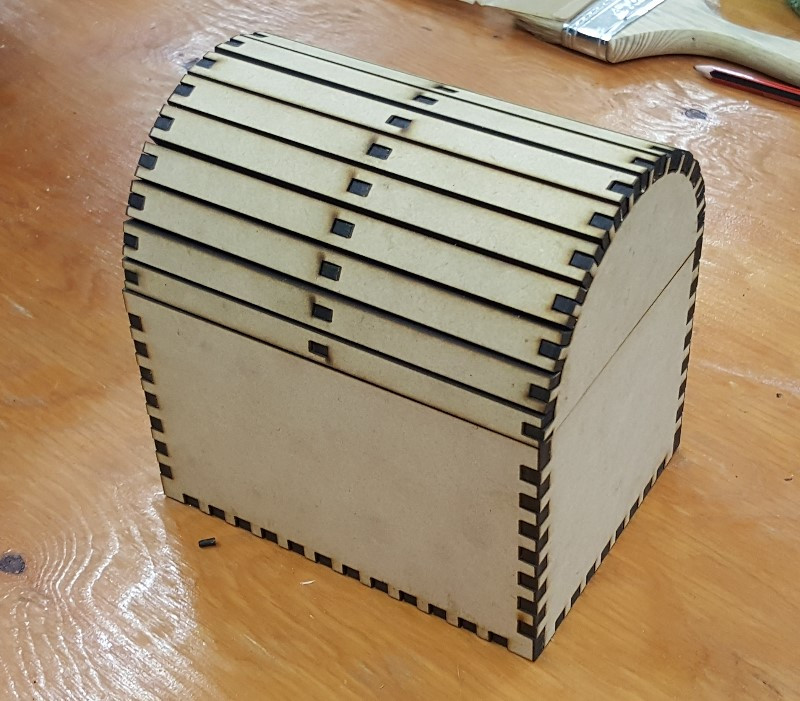
It's mate of laser cut wood.
It's guts are made of electronics.
When we hold our RFID card (like an Octopus card) up to it, it'll flash a happy green light, play a happy sound, and happily open for us.
If we hold the wrong RFID card it'll show an angry red light, play an angry sound and angrily refuse to open for us.
First Connections!
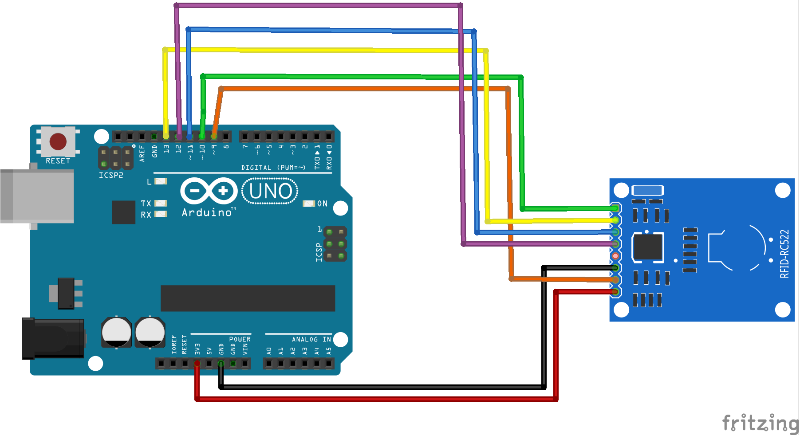
Before we go and build any boxes we need to get our electronics working, first of all we need to understand our RFID reader.
It's needs quite a few wires to communicate with the Arduino Uno, 5 in fact. It also needs 3.3v and GND connection. MAKE SURE YOU PLUG IT INTO THE 3v3 and not the 5v unless you want some magic smoke!
First Code
											First you'll need to download this library and place it in your "documents/Arduino/libraries" folder

                       #include <SPI.h>
                       #include <MFRC522.h> // library for the RFID reader

											 #define SS_PIN 10
											 #define RST_PIN 9
                       MFRC522 rfid(SS_PIN, RST_PIN);  // Create RFID object.

											 byte storedCard[4]= {21,82,24,171};   // Stores a 4 byte card ID
											 byte readCard[4];   // Stores scanned ID read from RFID Module

                       void setup() {
                          Serial.begin(9600); // Initialize serial communications with the PC
                          SPI.begin();      // Init SPI communication bus
											    rfid.PCD_Init(); // Init MFRC522 card
											    Serial.println("Scan card to see UID and type...");
                       }

                       void loop() {
                         // Look for new cards
                         if ( ! rfid.PICC_IsNewCardPresent()) {
                         return; // If there's no card, return to the start of the loop
                         }

                         if ( ! rfid.PICC_ReadCardSerial()) {
                         return; // If there's a card but we can't read it properly, return to the start of the loop
                         }

											  // Otherwise we have a card we can read, dump the details of the card to Serial
											  rfid.PICC_DumpToSerial(&(rfid.uid));

                       }
Now we can upload our card and try it out, if it's working properly a large amount of information should be dumped over the serial connection when we show a readable card to the card reader
HINT: In case you forgot, you can listen to the Arduino serial connection with the Serial Monitor in Tools->Serial Monitor or by clicking the magnifying class at the top right of the Arduino IDE
Next we need to adjust our code so it checks just the card ID and compares it to a card ID we have stored, you can pick one of the card ID's that you've scanned and enter the numbers into your storedCard[] object at the start of your code.
Second Code
                       #include <SPI.h>
                       #include <MFRC522.h> // library for the RFID reader

											 #define SS_PIN 10
											 #define RST_PIN 9
                       MFRC522 rfid(SS_PIN, RST_PIN);  // Create RFID object.

											 byte storedCard[4]= {21,82,24,171};   // Stores a 4 byte card ID
											 byte readCard[4];   // Stores scanned ID read from RFID Module

                       void setup() {
                          Serial.begin(9600); // Initialize serial communications with the PC
                          SPI.begin();      // Init SPI communication bus
											    rfid.PCD_Init(); // Init MFRC522 card
											    Serial.println("Scan card to see UID and type...");
                       }

                       void loop() {
                         if (getID()){ // If we can get the ID from a card
											   if (tryMatchID()){ // .. and if it matches our stored card ID
											   Serial.println("CARD MATCHES!");
											   } else {
											   Serial.println("CARD DOESN'T MATCH :-(");
											   }
											   }

                       }

											 boolean tryMatchID() {
											  // We check each number in our readCard[] against the numbers in storedCard[]
											  for ( uint8_t i = 0; i < 4; i++) {
											  if (readCard[i] != storedCard[i]) {
											  return false;
											  }
											  }
											  return true;
											 }

											 boolean getID(){
											   if ( ! rfid.PICC_IsNewCardPresent()) {
	                       return; // If there's no card, return to the start of the loop
	                       }

	                       if ( ! rfid.PICC_ReadCardSerial()) {
	                       return; // If there's a card but we can't read it properly, return to the start of the loop
	                       }

											   // Found a card, copy it's 4 id numbers (bytes) into the readCard[] object.
											   Serial.println("Scanning card UID:");
											   for ( uint8_t i = 0; i < 4; i++) {
											   readCard[i] = rfid.uid.uidByte[i];
											   Serial.print(readCard[i]);
											   Serial.print(",");
											  }
											  Serial.println("");
											  rfid.PICC_HaltA(); // Stop reading
											  return true;
											 }
One Last Thing!
We did pretty good, now we have code that can check our card and tell us if it's the right one.
If we've got a bit of time we can add some feedback so we know that we got the right or wrong card straight away by playing a sound.
Get a speaker from Mr Jake and plug it into the GND and '6' pins on the Arduino.
In the setup(){} block, add the line 'pinMode(6, OUTPUT);'
After the line 'Serial.println("CARD MATCHES!");' add the following lines.
											 tone(6, 400);
											 delay(500);
											 tone(6, 440);
											 delay(500);
											 tone(6, 500);
											 delay(500);
That should play a lovely, happy, rising tune to tell us the Arduino likes our card.
Now use your super smarts to add a sad, falling tune when the Arduino doesn't like our card.