Goal
Now that we know how to control Grabby's servos individually, it's time to find an effective way to control all of them at once.
There are lots of options open to us, we are going to use an app to control him from our computers.
1. Wire up Grabby
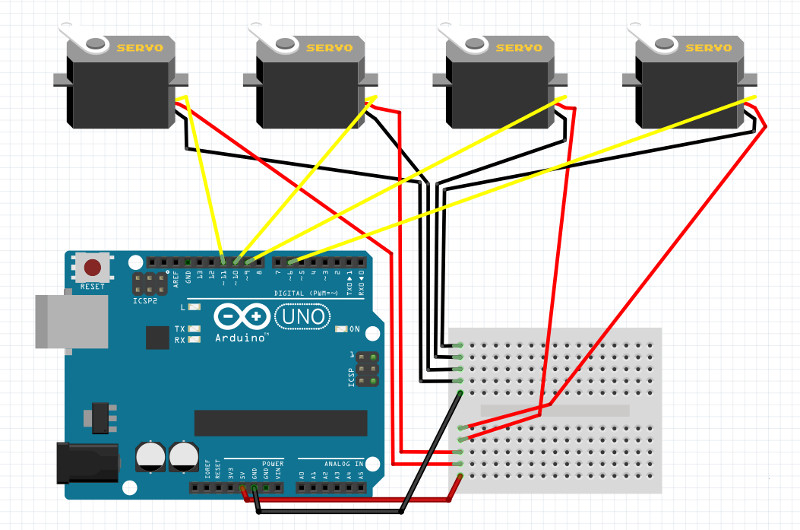
Either wire up Grabby using the following diagram from last weeks class.
Or plug the servos into the premade Grabby Controller.
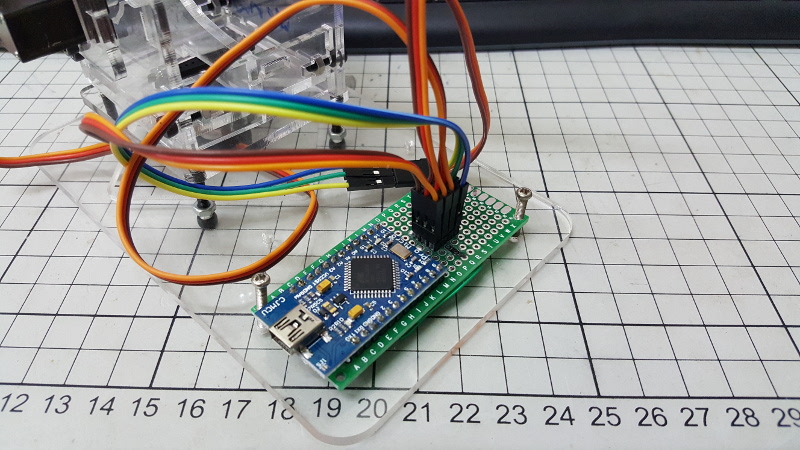
Make sure the yellow wire goes on the side away from Grabby, and that an extension wire is used for Robbys claw as the servo wire is not long enough.
The servos should be plugged in from left to right; left arm servo, right arm servo, base servo, claw servo.
Controlling Grabby from a computer
We are not going to use Arduino to control Grabby directly, we are going to use a library called "Firmata" which lets us control him from another app.
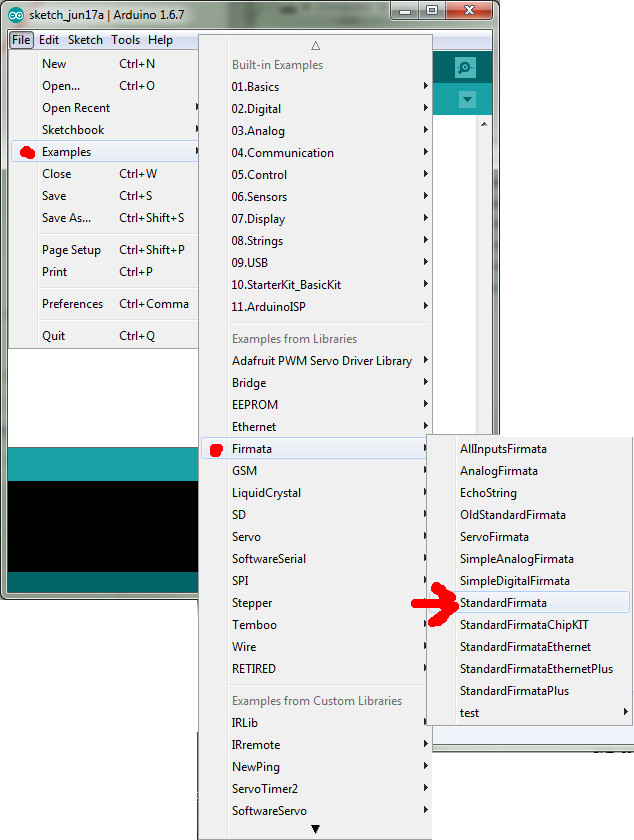
First we have to upload the StandardFirmata code to Grabby's Arduino, to do that open Arduino IDE and go to File->Examples->Firmata->StandardFirmata and upload it to Grabby.
Once that is successfully uploaded we need to open the Processing app which can be downloaded from the bottom of the Lessons page. Make sure you get the Windows version if you are using Windows, and the Mac version if you are using a Mac.
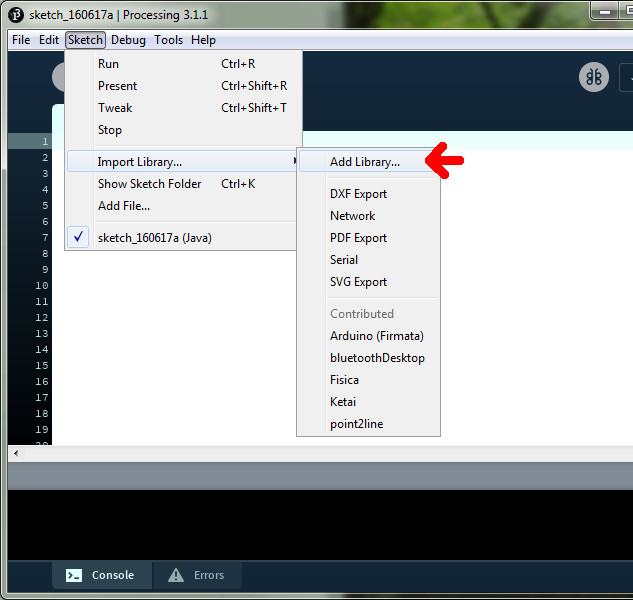
Next you need to download the Firmata libary for Processing, this can be done in Processing by clicking up the top on Sketch->Import Library...->Add Library as below.
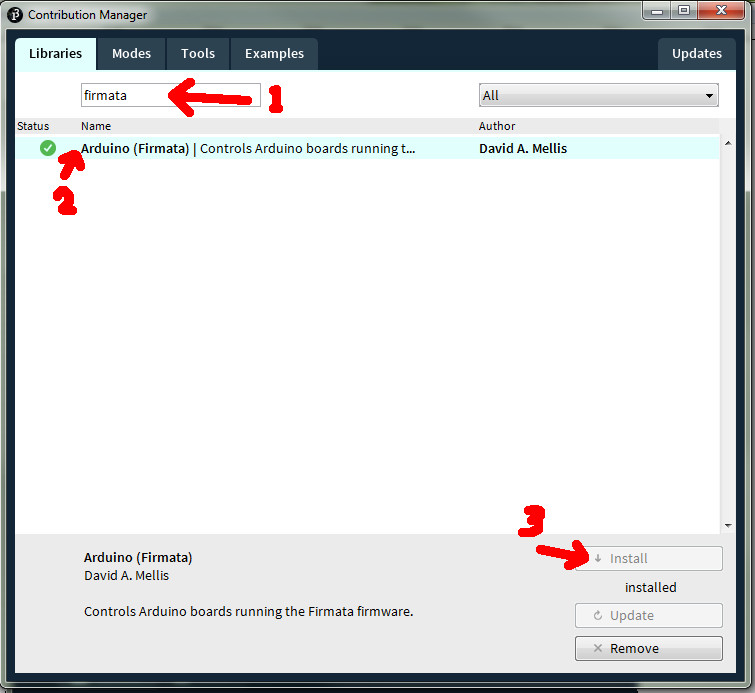
Then as in the image below, type "firmata" into the search box, "Arduino (Firmata)" should show up in the list below, click on that and then the install button at the bottom right.
Now we have installed Firmata for Processing so we can write an app to control Grabby directly.
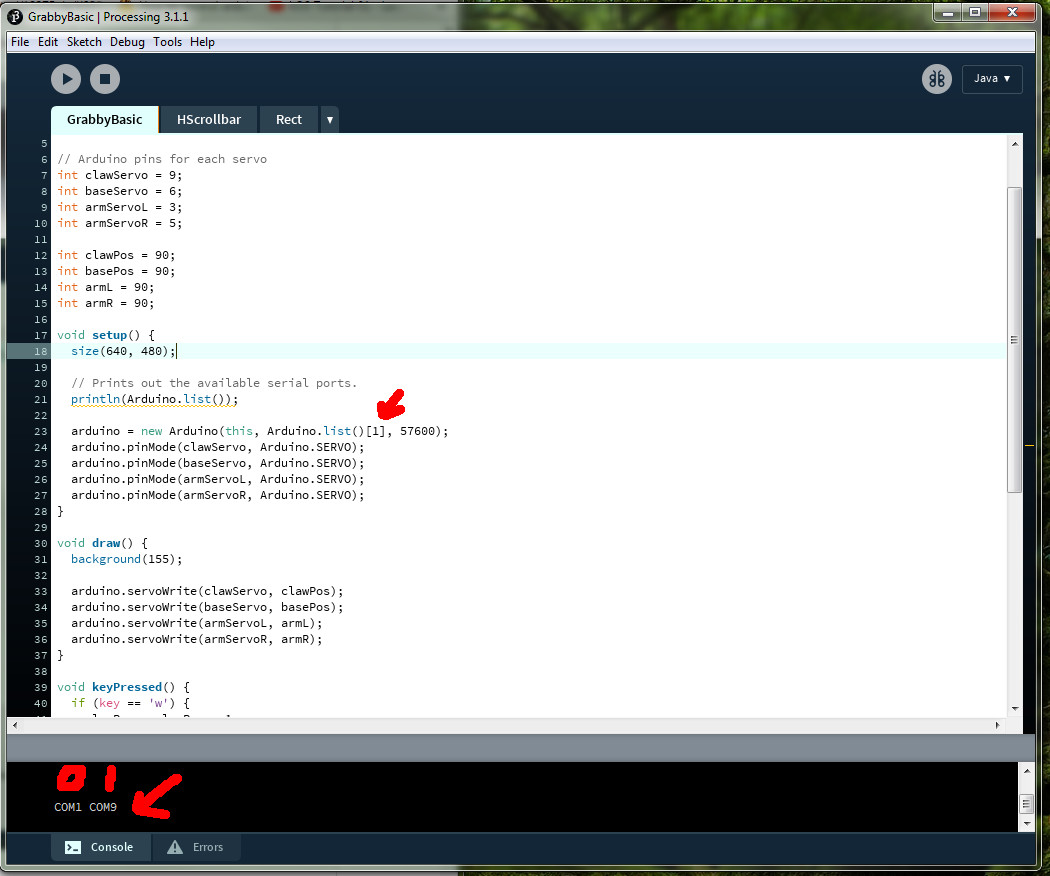
Copy and paste the code from here into Processing and run it with the Play button at the top left.
If you get an error it might be because your program is trying to talk to the wrong communication port, in the black box at the bottom of he Processing window you should see a list of ports "COM1 COM9" etc. If it didnt work you have the wrong one selected so have to change the number in "Arduino.list()[1]", try each number one at a time starting from 0.
A better app
Now that we've had a chance to play with that and take some time to understand the code, lets install more complicated but easier to use version of the code.
Download it here and put in in your documents->Processing folder.