Goal
Now that we've finally finished building Grabby, it's time to teach him to move.
1. Servos
Grabby uses servos like this one to move.
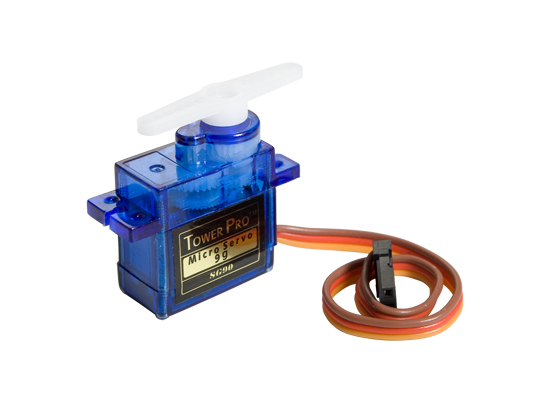
A servo is a kind of motor, but rather than just turning left or right it can to the exact angle we want.
It has three wires, a red one for 5V, a brown/black one for GND and a third yellow one which is used to send the signal to tell it what angle to turn to. Even if the 5V and the GND are plugged in, the servo will not turn unless we use the yellow wire to send it a signal.
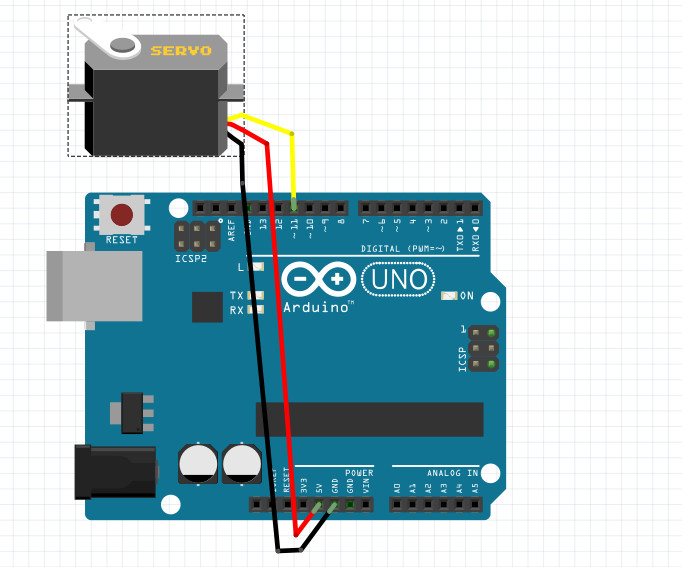
Follow the above diagram to plug in just the servo for Grabbys claw.
Coding a servo
There are only a few lines we need to use a servo.
                       #include <Servo.h> // This includes the instructions the Arduino needs to run the servo

                       Servo claw;             // This creates a servo in the Arduinos memory called "claw"

                       void setup(){
                          claw.attach(11);     // This tells the Arduino that the claw is plugged into pin 11
                       }

                       void loop(){
                          claw.write(90);     // This line tells the Servo to move to 90 degrees
                       }
Thats it, if you upload the code now the servo will swing to 90 degrees. Try a few different angles to see what happens. Make sure not to go less than 0 or more than 180 as those are the limits of the servo.
If you're ahead of everyone else have some fun and put in two write commands with delays in between to make the claw open and close.
                       void loop(){
                          claw.write(20);     // The angles might be a bit different for your Grabby
                          delay(1500);
                          claw.write(150);
                          delay(1500);
                       }
Connecting the rest of the servos.
All the other servos work exactly the same, but we need to plug the 5V and GND wires into a breadboard first so there is enough places for them all to plug in to.
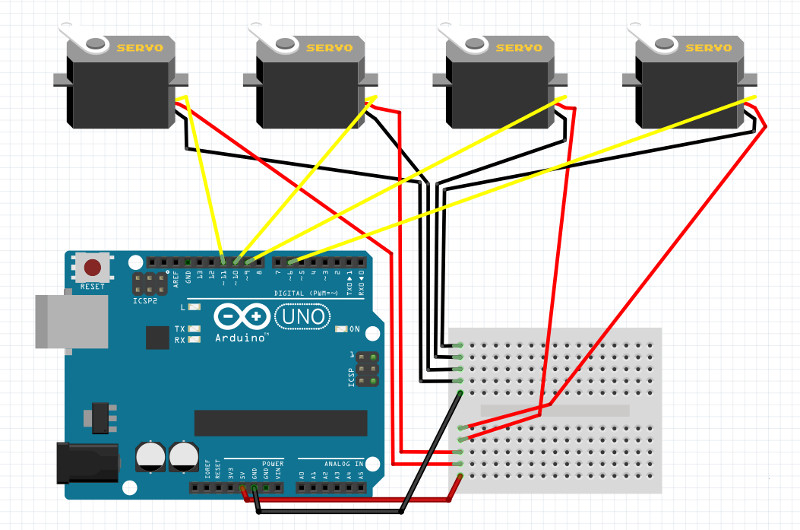
Make sure not to mix up the 5V and GND wires as that can damage the servos.
The code is exactly the same as before, every line except the include line has to be copied for each servo.
                       #include <Servo.h> // This includes the instructions the Arduino needs to run the servo

                       Servo claw;             // This creates a servo in the Arduinos memory called "claw"
                       Servo base;
                       Servo arm1;
                       Servo arm2;

                       void setup(){
                          claw.attach(11);     // This tells the Arduino that the claw is plugged into pin 11
                          base.attach(10);
                          arm1.attach(9);
                          arm2.attach(6);
                       }

                       void loop(){
                          claw.write(90);     // This line tells the Servo to move to 90 degrees
                          base.write(90);
                          arm1.write(90);
                          arm2.write(90);
                       }
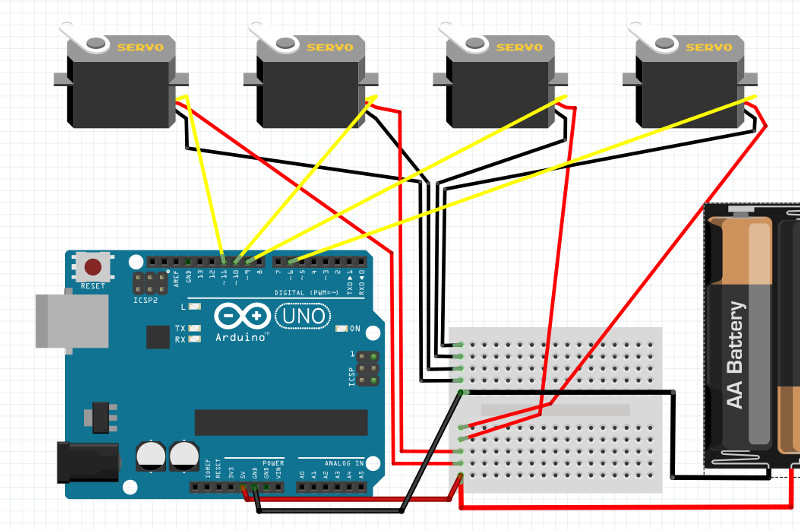
Servos require a fair bit of current to work properly so if you find that your arm is not holding in the right position or can't lift up it is probably because the USB in your laptop can't handle it. If that is happening you should add 4 AA batteries as below.
So now we can control Grabby but only by uploading different code with different numbers, next week we'll work on controlling him in real time.