Goal
Today we will learn how to use an HC-SR04 sonar device to measure distance.
We will later use this device as the "eyes" of our robot to judge the distance of obstacles to be avoided.
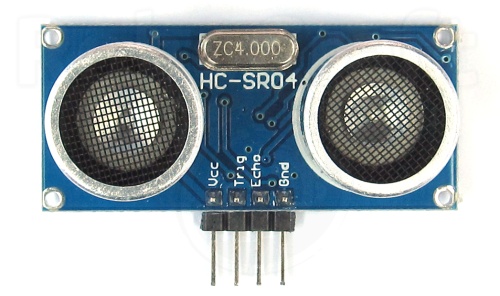
HC-SR04 Sonar Rangefinder
1. Getting a message from the Arduino
Before we learn to use the sonar unit we have a problem, even if the sonar unit is working how can we know what the distance is?
We need a way to get a message from the Arduino to our computer, we can do this through a Serial link, the same way we sent our code to the Arduino but this time going the other way.
First in out setup() function we need to open serial communications.
                       void setup() {
                         Serial.begin(9600);
                       }
Simple as that, we have now opened a Serial link from the Arduino at a frequency of 9600. To send a message we use the Serial.println() function.
                       void loop() {
                         Serial.println("Hello");
                       }
If we upload this program to our Arduino successfully it will now be sending our message back to us along the USB cable serial link. But how can we read it?
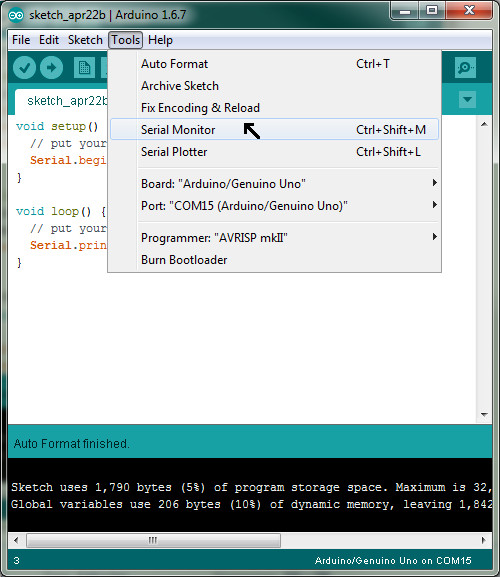
Click the tools menu and then the Serial Monitor
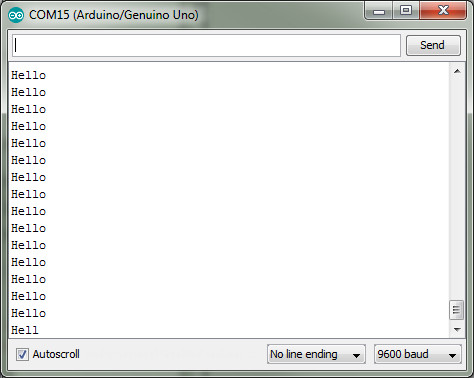
When you open the Serial Monitor you should see the message being sent by the Arduino.
Try going back and changing the message.
Sonar Time
The sonar device works by making a sound with one speaker and timing how long it takes for the sound to come back. If it takes a short time then that means there is an object close, if it takes a long time for the sound to bounce back then it must be a long way.
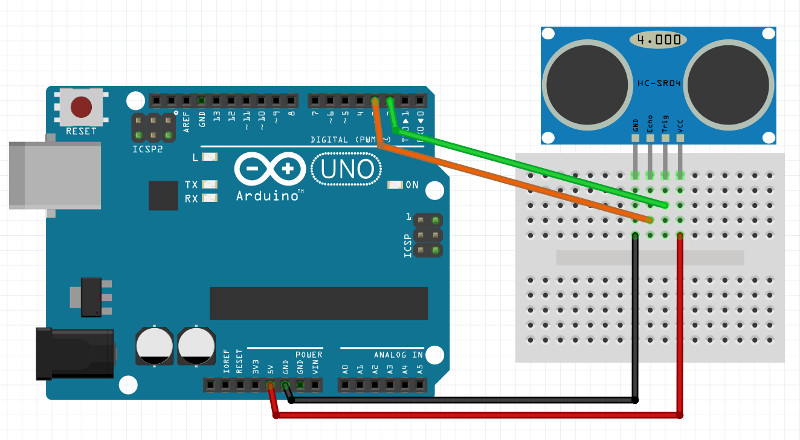
First, lets wire up our SR04. The vcc on the SR04 needs to plug into our Arduinos vcc or 5V pin, the GND of the SR04 needs to plug into our Arduinos GND.
The Trig and Echo pins on the SR04 can be plugged into any of the digital pins on the Arduino, we will use 2 and 3.
We tell the SR04 to make a sound by turning it's Trig (trigger) pin HIGH then LOW.
                       void loop() {
                         digitalWrite(2, HIGH);
                         delay(1);
                         digitalWrite(2, LOW);
                       }
The SR04 will then make a sound (you won't hear it, it's too high) and wait until that same sound bounces back. When the sound comes back it will send us a signal by turning its Echo pin to HIGH for the amount of time it took to recieve the sound back.
To read the signal we need to use a new command to listed for a pulse and change it into a number
We'll also go up to our setup() function and set our pinmodes and begin the serial link.
                       void setup() {
                         Serial.begin(9600);
                         pinMode(2, OUTPUT);
                         pinMode(3, INPUT); // note that pin 3 is set to INPUT, we will be recieving a current through this one, not sending one
                       }


                       void loop() {
                         long distance; // This variable will hold the value we get from the SR04

                         digitalWrite(2, HIGH);
                         delay(1);
                         digitalWrite(2, LOW);

                         distance = pulseIn(3, HIGH); // This function listens for a pulse HIGH->LOW on pin 3
                         distance = distance / 58.2; // This bit of math converts the time into a centimetre value
                         Serial.println(distance); // Finally we send the distance over the serial link so we can check it
                       }
Bonus - Functions
We really don't want to have so many lines of code in our loop() function so we need a way to clean it up.
A function is a block of code that can be called at any time, the setup() and loop() functions are called automatically but we can make and call our own.
                       void loop() {
                         GetDistance();
                       }

                       void GetDistance() { // This function is built just like our loop() and setup() functions
                         long distance;

                         digitalWrite(2, HIGH);
                         delay(1);
                         digitalWrite(2, LOW);

                         distance = pulseIn(3, HIGH);
                         distance = distance / 58.2;
                         Serial.println(distance);
                       }
When we use the GetDistance() function in our loop the Arduino will jump down to the function we made and run through every line of code before returning back to the next line in the loop() function.
Now our loop is nice and clean with only one line of code, this will become much more useful later when we have sonar code, motor code and a bunch of other stuff all taking up space. Writing neat code is very important.